Monday, October 3, 2011

Fall "mantel"

I am currently obsessing over how i wish i had a mantel to decorate for the seasons. All you crafty women put there with your beautiful fall vignettes..well.. i made do with what i had and that is over the kitchen cabinets!


This is usually a difficult area for me but i read some information online about how to decorate above there and i ran with it. I used all the stuff i currently had plus a couple dollar store plastic pumpkins and a little crow. Yay me for being frugal lol :)


So here it is in all its glory. I grabbed my fall garland and placed that in front and mounted my decorations on books to give them height. I will work from left to right on where i got things. Fall lantern and all candlesticks shown are from yard sales. Apothecary jar was from Tai Pan Trading filled with Walmart pinecones and gourds.


 The subway art was purchased from MyTreehouseTreasures.com and i put that in an 11 x 14 frame i had lying around. The bowl was from Pier One imports i received as a gift for my wedding a few years ago but i am sure you could find something similar elsewhere.


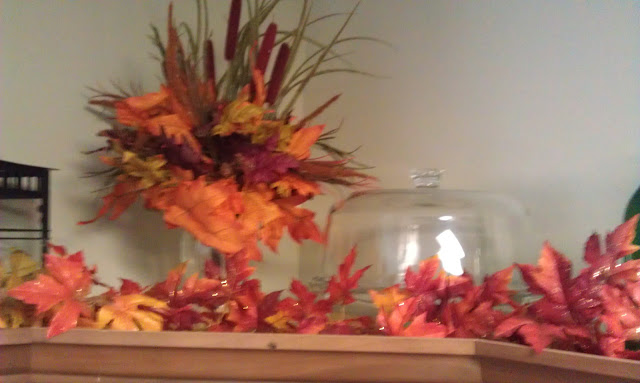
The black lantern was also from pier one imports. I took some fall foliage stems i got at a yard sale and put them into a glass vase next to my cake stand.


The green bottles i also got from a yard sale and the famous cheese cloche turned bell jar sits with a dollar store pumpkin inside. Not a lot of work and it all came at a small price. Hope you like it and remember we don't have to swoon over mantels when you have kitchen cabinets to decorate above :)

Happy Fall Ya'll!

Monday, September 26, 2011

Fall Pillows for under $20


I just love fall. The crisp air, boots, cozy sweaters, pumpkins and of course the fall decor. My couch was desperate for a fall makeover and pillows were the way to go. I went to my local Joann fabrics and scored three coordinating fall fabrics for under $5 a yard each. Yeah baby!! Well went i got home i decided that three plain pillows was not going to cut it. i wanted graphic prints and detail to my pillows so i went back to joanns and after about two hours trying to find better fabrics and thinking of how i was going to make them work together i went home and decided to just make my fabrics work for me. I just love the way they turned out!!
 To make the circle pillow:

Two fabrics
a glass
marking pencil
scissors
fabric glue

I took a tall glass and traced around the widest part and then turned it upside down and traced the smaller end inside the circle and cut it out.
After i had a bunch or circles i just laid them out slightly overlapping each other. and gluing them down onto the coordinating fabric with liquid stitch. You will want to use a fairly think fabric so the glue does not leave a mark when it seeps through.


When you have them all glued and dried you simply take your two pieces of fabric outside in and sew around the outter edge, leaving a small area open to turn the pillow inside out and to stuff the pillow. Once you stuff your pillow just sew up the hole and you have a pillow!.


These pillows were just the fabric i got, nothing special was done. Besides the bow. i just wrapped a strip of fabric around it and sewed the back up and took a small piece of fabric and knotted the front to make it look like a bow.


Sorry no closeup photos of the chevron pillow. This was a mess up experience with not using a thick fabric and adding fabric glue. Next time i will sew them on. I just cut zig zags out of strips of fabric and glued them onto the pillow..


Hope ya like them and thanks for stopping by!


Wednesday, August 31, 2011

Pin cushion for under $1

Lately i have beens sewing up a storm but i have been having this really annoying thing happen where i foregt where my pins are and the canister falls on the floor and pins go everywhere! One day this happened about ten times in a row and with a baby crawling al over the floor this not only was annoying but hazardous. I comes low budget pin cushion. I recently went to Joanns and found that they have those ugly tomato pin cushions for about $3.00 and i really didn't want to spend that much, call me cheap lol.

So i found this little baby for $1 and i had a 40% off coupon i wasn't using so heck yeah cheap little pin cushion.


To start i should have painted it first but i got too excited and started with the pin cushion part and painted last. I just stuffed the box with a little pillow stuffing and hot glued a small piece of fabric scrap i had along the inside corners and sides of the box.


Then i painted in a baby blue acrylic paint from joann's line of paints ( super cheap paint) and i had some old vinyl decals lying around so i spiced up my box with those and Voila! super cheap pin cushion and i closes so its practically baby proof! 


Hope you like! Thanks for stopping by!

Thursday, August 25, 2011

Cardigan turned ruffle shirt

A few months ago i went to Costco and i found these wonderful cardigans made of a jersey knit material. However, because there are no mirrors at Costco i had to just expect they would be ok.. well... i never wore them and in the closet they sat. Until today :)
This is what the cardigan looked like before. i  didnt take pictures while i was making the first one because i was afraid it would not work out but the pink is the exact same style.
First step i did was cross the sides over each other.

Then all i did was sew a straight diagonal line down the seam. Backstitching the first stitch or two and at the end i just pulled the bobbin thread and watch the ruffles begin :) I simply knotted the thread off and viola! adorable shirt or pullover cardi.


hope ya like! have a wonderful thursday!


Wednesday, August 24, 2011

Thrifty Finds

Lately i have been scouring yard sales and thrift stores to find things to makeover or add to our home decor because our home has so much empty space that craves attention lol. Anyways, a couple weeks ago i went to an estate sale and WOW did i find some great things!
I love this little fall lantern i picked up. I got most of this stash for just 5 bucks!!! The clock and teapot i got at the D.I. for just a dollar each.
I am thinking i want to paint this little guy a glossy white! Oh the vision i have :)

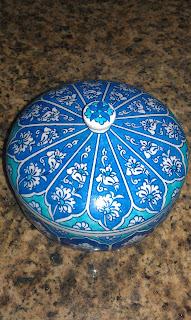
My favorite find is this beautiful canister. On the bottom it says it was hand painted in turkey! Oh this might be my inspiration to do our living room in turquoise accents!!!

 Love this crystal jar! I think that the grandmas and grandpas of today have the coolest things!!!

Don't you love this silver plated dessert tray?! i'm not sure if i'll paint it or simply Polish her up. what would you do with these amazing finds?


Free Art

As we make our way to the master bedroom reveal i could not wait to show you the art i made completely. Free! I have seen art similar to this all over Etsy but i decided to make it myself instead of buy on etsy. I customized it for the colors in our bedroom and picked words that are meaningful to my hubby and I.


All i did to make this was go into Microsoft Word and chose font Impact in size 70 and typed the alphabet. Then i inserted words i liked and in the colors to match our bedroom. I printed the final version cardstock with my printer.


Last I put it into a frame i got from the thrift store and leaned it up against the wall on my dresser. I Love it and i think i will make more for the rest of my house. :) Hope you all have a wonderful day and Craft On!!

Thursday, August 4, 2011

Super Easy Cut-offs made cute!

i know you all have those pair of jeans or pants that you take camping or paint in, so do i and after my hubby saw the huge hole in the knee he decided they needed to go lol. Being the frugal gal that i am i could not see those jeans go to waste so i decided to dress them up.

you'll need:
pair of jeans
fabric quarter in your fave fabric
fabric scissors
dress making pins
fabric glue or sewing machine

first i cut my jeans at the length i wanted them. Then i cut a peice of fabric the width i wanted and measured around the leg of the jeans for how long i needed. Then i folded a 1/4" peice back to create a finished edge

This is the cuff inside the leg of the jeans. So you are making a donut of fabric and folding the edges inside the cuff.
  The best fabric glue if you are not an expert with the sewing machine.
 The loops close up

Finished!

 All i did after was glue the piece of fabric to the jeans. I cut little strips of fabric to cover the belt loops and voila. Finished! SOOOO Easy and you don't have to sew the edge like i did you can simple fabric glue the edge down. thanks for  reading!!

Wednesday, August 3, 2011

Dresser Revamp

I am so excited to share our first furniture makeover with you! After being so bored with our Master bedroom and feeling like it was the only room in the house that had been neglected we opted to make our own customized furniture for nearly free! so lets get to it!
We sold our ikea dresser online for $140 and bought this beauty which also included a large mirror for $100 on utah's version of craigslist called KSL. With the money left over we bought some supplies to get the makeover started. So we went to home Depot and bought fine sandpaper, primer, spray paint, and brasso. So here she is sanded down and the drawers removed.

We bought gray Rustoleum 2x spray primers and a spray handle so my hubby's hands would not hurt after spraying so much.
While my hubby primed the whole dresser after we lightly sanded it was time to clean up those handles. The handles were so beautiful we wanted to see what they would be like if we cleaned them up instead of replacing them. Here they are before Brasso.
and after Brasso. Look at those babies shine!!!


After priming the hubby spray painted with a Rustleum gloss black. the same brand as the primer.
Finally we applied a polyurethane spray and replaced the knobs, and lightly sanded the edges to give it that distressed look. I Love the way she turned out. What do you think?!

After:

Before: